Electronics are ingrained in our everyday lives, serving as essential tools for communication, convenience, and entertainment. But what happens when your smartphone screen cracks, your washing machine stops spinning, or your favourite speaker gives up? For many, the immediate reaction is to replace the device or call in professional help. However, learning DIY electronics repair can save you money, extend the life of your devices, and equip you with invaluable technical skills. Whether you’re a newbie or someone looking to refine existing skills, venturing into electronics repair can be a rewarding and empowering experience.
Essential Tools and Safety Measures
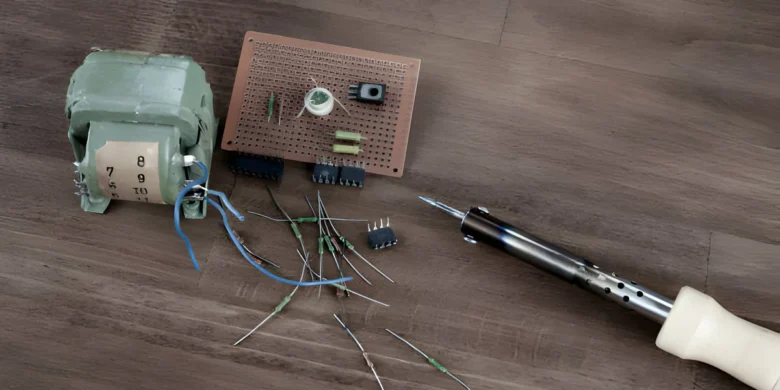
Before you get started, it’s crucial to equip yourself with the right tools. A basic electronics repair kit typically includes a soldering iron, multimeter, pliers, screwdrivers, and anti-static wristbands. These tools will allow you to test circuits, fix loose connections, and replace components effectively. Equally important is ensuring safety during repair work. Unplug devices before working on them, discharge capacitors to avoid electric shocks, and always work in a well-lit area. Safety glasses are a must, especially when soldering. Taking these precautions will help you avoid accidents and work confidently on any project.
Basic Electronic Components
Understanding basic electronic components is fundamental to repair work. Resistors, capacitors, diodes, and transistors are small but mighty components that play critical roles in the function of most devices. For instance, a simple resistor controls the flow of electricity in a circuit, while a capacitor stores and releases energy. Identifying these parts and understanding their roles can help you troubleshoot issues effectively. There are plenty of online resources, guides, and even circuit simulation tools that can help you familiarise yourself with these components.
Troubleshooting Common Issues
Effective troubleshooting is at the heart of DIY electronics repair. Begin by observing the symptoms of the device. Does it fail to power on? Is there an unusual noise, or has the performance dropped significantly? Use a systematic approach to identify the faulty component. A multimeter is a handy tool for checking voltage, resistance, and continuity in circuits. Often, the solution might be as simple as replacing a blown fuse, soldering a loose connection, or cleaning corrosion off electrical contacts. Sometimes, patience and experimentation are key to understanding the problem and finding a fix.
Repairing Smartphones and Tablets
Smartphones and tablets are among the most frequently repaired devices in DIY circles. From cracked screens and swollen batteries to malfunctioning charging ports, these gadgets are prone to wear and tear. Repair kits designed specifically for smartphones often include pentalobe screwdrivers, suction cups, and adhesive strips. Online tutorials and teardown guides from websites like iFixit provide step-by-step instructions for common repairs. With time, practice, and care, you can confidently handle basic smartphone repairs, saving yourself the expense of professional services or premature replacements.
Fixing Home Appliances
Home appliances like washing machines, microwaves, and refrigerators are indispensable, but they’re also prone to issues due to regular use. Common problems might include a faulty heating element in a microwave, a worn-out motor in a washing machine, or a refrigerant leak in a freezer. Diagnosing appliance issues often involves identifying error codes or using a multimeter to check components. Repairing appliances requires a bit more effort, particularly because they can be larger and more complex. However, the cost savings and the satisfaction of restoring your appliance to working condition make it worthwhile.
Introduction to Solar Power
Exploring solar power is both a fascinating and practical venture. Solar energy is a clean, renewable source of electricity that has become increasingly popular for personal and commercial use. By understanding how solar photovoltaic cells convert sunlight into electricity, you unlock the potential to create energy-efficient devices and systems. Whether you’re building a small solar-powered gadget or planning a more ambitious installation, incorporating solar energy into your DIY projects is a step toward sustainability and energy independence.
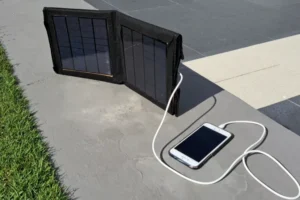
Make Your Own Solar-Powered Phone Charger
One of the best beginner-friendly solar projects is building a solar-powered phone charger. Imagine charging your phone anywhere, anytime, without relying on power outlets. To create this charger, you’ll need a small solar panel, a charging circuit, a USB connector, and a battery pack for energy storage. The process involves connecting these components securely, soldering where necessary, and testing the circuitry in sunlight. Once completed, this project not only provides you with a functional gadget but also deepens your understanding of renewable energy.
Assembling the Charger
The assembly process for a solar charger is hands-on but straightforward. Start by connecting the solar panel to the charging circuit, ensuring the flow of electricity is properly directed. Next, attach the charging circuit to a battery pack to store energy for later use. A USB port is then linked to the output for connecting to your phone. Secure all components with soldering and test the charger under direct sunlight. Adjustments may be necessary to optimise performance, but once complete, you’ll have a portable, eco-friendly way to stay powered on the go.
Advanced Techniques and Resources
For those looking to deepen their skills, exploring advanced techniques and resources in electronics repair is the next logical step. Topics like microcontroller programming with Arduino or Raspberry Pi can open doors to creating smart devices. Learning PCB (Printed Circuit Board) design allows you to create sleek, compact circuits for custom gadgets. Online courses, forums, and maker communities are fantastic resources for expanding your knowledge. Platforms like YouTube and Udemy offer tutorials on everything from soldering to reverse-engineering electronic devices. The opportunities to learn and innovate are virtually limitless in the DIY electronics space.
Empower Yourself with DIY Electronics Repair
DIY electronics repair may feel daunting at first, but the rewards far outweigh the initial challenges. By gathering the right tools, understanding the basics, and tackling small projects, you can develop an invaluable skill set over time. Start small, perhaps with a solar-powered phone charger or basic troubleshooting, and expand your horizons as your confidence grows. The best part? You not only save money but also contribute to sustainability by reviving rather than replacing gadgets. Begin your DIY electronics adventure today, and discover just how empowering hands-on repair can be.
FAQs
1. Why should I learn DIY electronics repair?
DIY electronics repair saves money, minimises electronic waste, and equips you with valuable skills applicable in everyday life.
2. Are electrical repairs safe for beginners?
Yes, provided you follow safety measures like unplugging devices, wearing safety gear, and avoiding high-voltage repairs if untrained.
3. What are the essential tools for beginners?
Basic tools include a multimeter, soldering kit, pliers, screwdrivers, and anti-static wristbands.
4. Where can I learn more about electronics repair?
Many resources are available online, including video tutorials, forums, and educational platforms like Coursera, Udemy, and Khan Academy.