Designing your custom Bluetooth speaker is an enjoyable project that blends the power of imagination and technical expertise as well as a love of the music industry or making your own electronics. If you’re a novice looking to learn more about electronics or an experienced maker who wants to build an individual device, creating your own unique speaker is an enjoyable project. This guide will take you through every step, from gathering parts to making your own unique design, and you’ll soon have your personal Bluetooth speaker.
Gathering Your Components
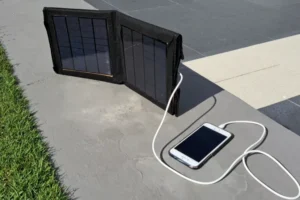
Before you begin, collecting the required components is essential. The heart of your Bluetooth speaker are several key components. It will require a Bluetooth Audio Receiver Module as well as an amplifier board, speakers and a rechargeable battery. Other important items include wire connectors, as well as the power switch. Also, make sure you possess tools like a soldering iron, multimeter and screwdrivers that will assist in making assembly more simple. The majority of these components are available on the internet or at the electronics shop in your area.
When choosing your components, take into consideration the dimensions and quality of sound you’d like from your speaker. For instance, smaller speakers will make your final device more compact, whereas larger speakers provide a more resonant sound. Make the right choice, bearing in mind how you intend to make use of your final device.
Preparing the Enclosure
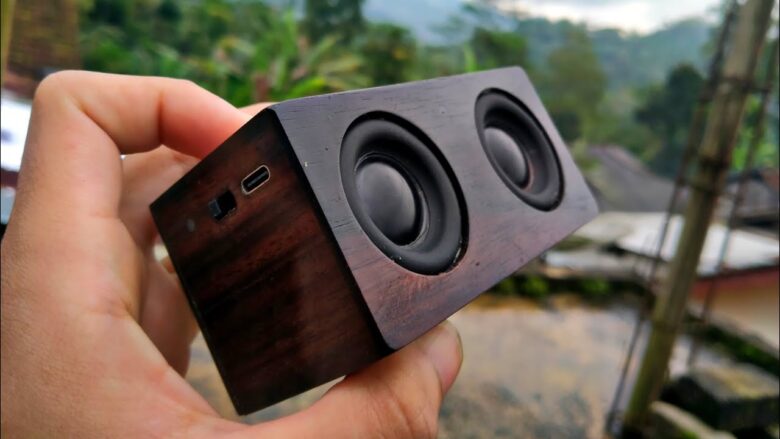
The enclosure is not only for looks; it also plays an important part in determining the quality and sound of your speakers. Start by deciding on the material you will use to make your enclosure. ABS plastic, wood, or even repurposed objects like old shoeboxes and vintage containers could be used, based on what you prefer.
After you’ve created your enclosure in place, you must plan the layout of it to ensure that the components are securely inside. Make use of the tool, like a drill, utility knife or Dremel tool, to create cutouts for components such as openings for speakers, the charging port, power switch and volume control. Smooth rough edges and think about painting or embellishing the enclosure to add an individual appearance. An enclosure that is well-designed will safeguard your equipment and improve the overall appearance of your work.
Wiring the Components
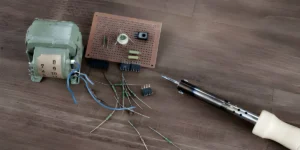
The next step is the technical part of your project, which is wiring the components. Begin with connecting your Bluetooth receiver and amplifier boards. This permits the Bluetooth module to transmit sound signals directly to the amp which powers your speakers.
Then, connect your audio speakers with the amp board. Be sure to match the orientation of the wires to avoid distortion. Be careful when soldering connections and then make use of the heat shrink tube to shield exposed wires for security.
If you’re using rechargeable batteries, connect it to your system and also to the charging module. Make sure you are aware of the proper power and voltage requirements to avoid damaging your equipment. A multimeter is an excellent instrument to check your connections and make sure the system is operating as intended.
Assembly and Testing
After the wiring is completed, then it’s time to put everything together to test the Bluetooth speaker. Connect all components to the enclosure using adhesive or screws to keep them in the right place. Check your wiring to ensure that there is nothing loose or incorrectly connected.
Before closing the enclosure, make sure you test your configuration. Power on and connect your Bluetooth speaker to a compatible device. Play some music to see whether everything is working. Be attentive to any problems like crackling or inconsistent sound, and then make any adjustments if needed. When you’re satisfied, seal your enclosure, and then your Bluetooth speaker is ready to go.
Customization and Enhancement
A major and exciting aspect of making your personal Bluetooth device is its capability to modify the speaker to suit your needs. It is possible to include LED lights that flash in time with your music, improve the sound quality with the digital signal processor (DSP) or add buttons for more advanced control options such as skipping tracks.
Consider adding additional features such as a handle that is waterproof or an external one to help your speaker be more suitable and suitable for use outdoors. The best part about DIY is that it allows you to build your own speaker to be unique and individual as your imagination will allow.
Your DIY Adventure Begins
Making your personal Bluetooth speaker is much more than developing a practical device, but it’s about getting more knowledge of electronics as well as showcasing your creative side. Following the steps above, you’ve created a unique speaker but also developed a set of skills which can be used in future projects. So why stop there? From altering sound profiles to increasing the portability of your device, there are countless possibilities to innovate.
For those who are new to DIY, tackling this endeavour could be your first step towards a fulfilling hobby. For those who are seasoned at tinkering The process will show what is possible with a small amount of effort and the appropriate tools. Make sure to play your preferred music and test your new design, and revel in the pleasure of creating something unique to you.
FAQs
1. Does one require previous experience in electronics to construct a Bluetooth device?
Not necessarily. With a thorough guide and a basic set of equipment, as well as safety measures, even novices can finish the task with ease.
2. Which tools are necessary to build this?
Essential tools like soldering irons, multimeters, wire strippers and screwdrivers are indispensable. A hot glue gun as well as heat shrink tubing are also beneficial in the securement of components.
3. What does it cost to construct a Bluetooth speaker?
The price varies based on the type and quality of components you pick. It could range between $30 and $100.
4. Do I have to reuse materials to make an enclosure?
Absolutely. Repurposing lunchboxes, wooden containers or tins will not only save you money but also add personality to your audio system.
5. When will this project be required to be finished?
The typical project takes from some hours to an entire day, based on your level of experience and the customisation options.