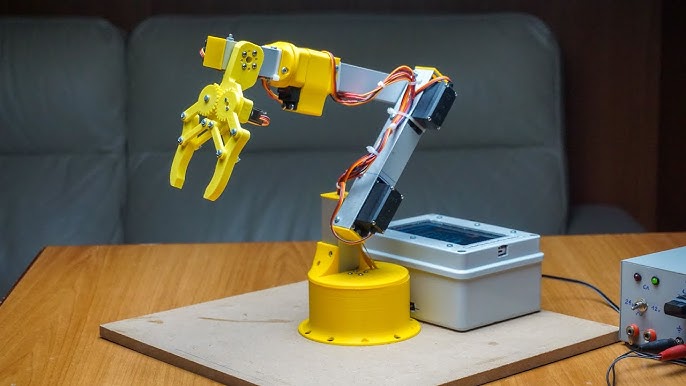
The world of robotics is both fascinating and rewarding, offering endless opportunities for innovation and learning. One such captivating project is building an Arduino robot arm. With their ability to mimic human hand movements, robot arms are being used in various fields like manufacturing, medical surgeries, material handling, and even education. For hobbyists and budding engineers, creating a robot arm can be an exciting way to learn about electronics, programming, and mechanical design. This guide will walk you through each step of the process, helping you create a fully functional robot arm by using Arduino as its backbone.
Required Components and Tools
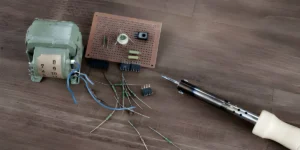
Before we begin building the robot arm, it’s essential to gather all the necessary components and tools. These include an Arduino board, servo motors, a power supply, jumper wires, a breadboard, and structural materials like plastic, wood, or aluminium for the arm. If you want to add functionality like gripping objects, you’ll also need grippers or end effectors. Tools such as screwdrivers, pliers, and glue guns will be needed during assembly. Make sure to have a basic soldering kit if any connections need to be made secure. Having all these ready will ensure a smooth workflow without interruptions.
Designing the Robot Arm Structure
The design of your robot arm is crucial for its functionality and stability. Most robot arms mimic the structure of a human arm, with a base, a shoulder joint, elbow joints, and a wrist. Begin by sketching your design or using CAD software to visualise how your arm will look. Decide on the number of degrees of freedom (DOF) you’d like the arm to have. Each joint will require a servo motor, so keep this in mind while planning. Strive for a lightweight yet sturdy design, as this will reduce stress on the motors while maintaining the ability to lift objects.
Assembling the Base and Shoulders
The base of the robot arm provides stability and is the anchor point for all other movements. Secure the servo motor for the base rotation firmly to avoid wobbling. Next, attach the shoulder joint to the base. This joint is responsible for the up-and-down movement of the arm. Use brackets or custom mounts to connect the shoulder servo and ensure that it moves smoothly. Test each connection for flexibility and ensure that everything is securely tightened to prevent mechanical failures during operation.
Connecting and Wiring the Servos
Once the structure is assembled, the next step is wiring the servo motors to the Arduino. Each servo motor comes with three wires for power, ground, and signal. Connect these appropriately to the Arduino pins using jumper wires and a breadboard. It’s essential to use an external power source for the servos, as they can consume more power than the Arduino can provide. Label wires if necessary, and keep the wiring neat and organised to avoid confusion during programming and troubleshooting.
Programming the Arduino for Arm Control
Now comes the exciting part—writing the program that will bring your robot arm to life. Using the Arduino IDE, upload a code that defines how each servo motor should move. Libraries like “Servo.h” simplify the process and allow you to control multiple servos with just a few lines of code. For instance, you can program the arm to move to specific angles or perform sequences like picking up and dropping objects. Test your code with simple movements first before implementing more complex behaviours.
Calibrating the Robot Arm
Calibration is crucial to ensure the arm performs tasks accurately. Adjust the starting angles of the servos so that they are at their neutral positions when powered on. Test the arm by moving it to various positions and ensure it reaches the desired angles without hitting its mechanical limits. If the arm seems to struggle with movements or is jittery, adjust the power supply and fine-tune the programming to match the hardware’s capabilities.
Adding Grippers and End Effectors
To give your robot arm the ability to interact with objects, attach grippers or other end effectors at the end of the arm. These can be simple two-finger grippers or more complex mechanisms like suction cups or claws. Connect the grippers to an additional servo motor and include its control in your existing code. Ensure that the gripper can open and close smoothly and that it can grip items with enough force without damaging them.
Testing and Troubleshooting
Once the robot arm is assembled and programmed, it’s time to test it in action. Start with basic movements and gradually progress to more complex sequences, such as picking up and placing objects. If the arm doesn’t function as expected, double-check the wiring, servo connections, and code logic. Refer to online forums or documentation for help if you encounter specific problems. Testing is an iterative process, so patience is key to fine-tuning your robot arm.
Advanced Features and Expansion
After mastering the basics, you can explore adding advanced features to your robot arm. Integrate sensors like ultrasonic modules for object detection or cameras for visual feedback. You can also connect your arm to a smartphone or computer to control it remotely. Adding machine learning algorithms can enable your robot to perform tasks autonomously, such as sorting objects based on colour or shape. The possibilities are endless, and this project can grow with your imagination and skills.
FAQs
1. How much does it cost to build an Arduino robot arm?
The cost depends on the materials and components you choose, but a basic robot arm can be built for around $50 to $100.
2. Do I need prior experience to build a robot arm?
Basic knowledge of electronics, programming, and mechanics is helpful, but there are plenty of beginner-friendly tutorials and resources available online to guide you.
3. How much time will this project take?
Building a simple robot arm can take a weekend, while more advanced versions may require a few weeks, depending on the complexity.
4. Can I use different microcontrollers instead of Arduino?
Yes, you can use alternatives like Raspberry Pi, ESP32, or others, though the code and setup may differ slightly.
5. What can I use my robot arm for?
You can use it for educational projects, automation tasks, or simply as a fun and interactive hobby project to showcase your skills.